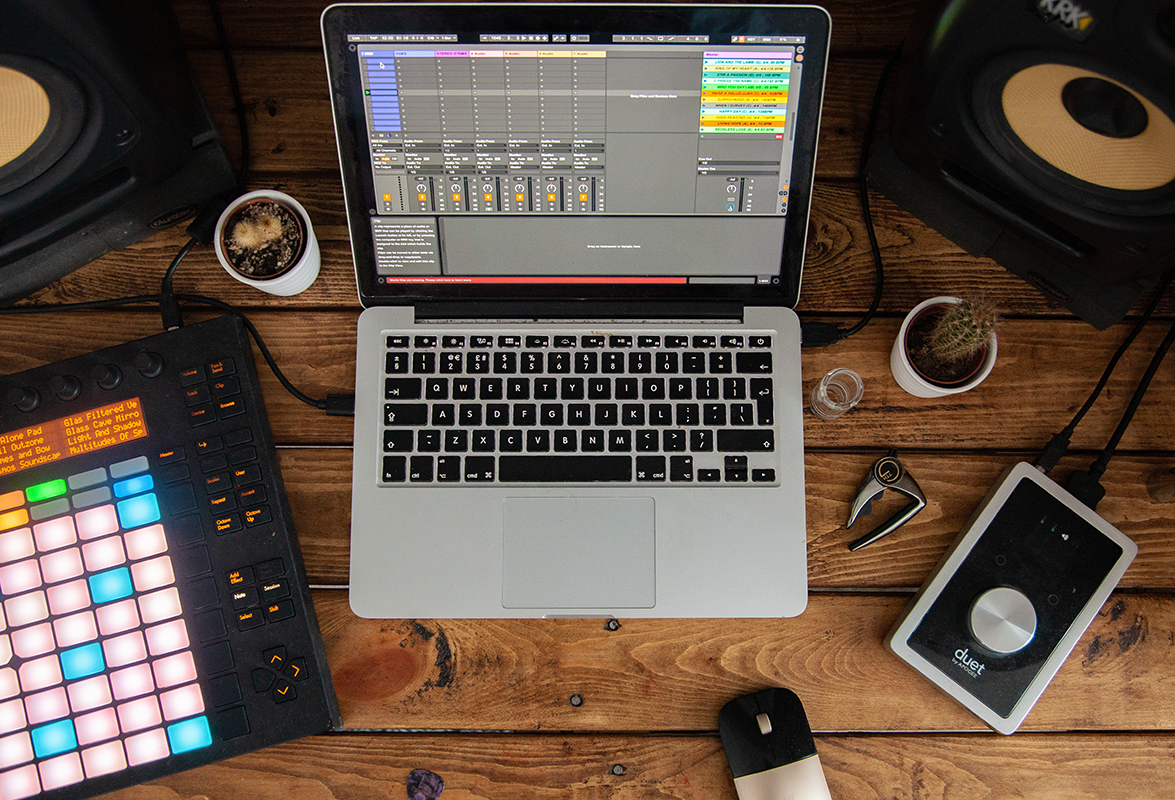
Creating kick drums from scratch in Ableton Live
- Sound Design
- 09.08.2022
- 6 min
Finding the right kick drum sound can be a bit of a time consuming process, and there is especially one thing to take into consideration when looking for a kick drum sample fit for your track. The fundamental frequency of the kick drum, since this will affect the phase correlation between the kick’s sub frequencies and the sub frequencies of your bass line.
However, instead of spending time looking for samples you can synthesize your own kick drum, and this has a lot of benefits, production and groove wise.
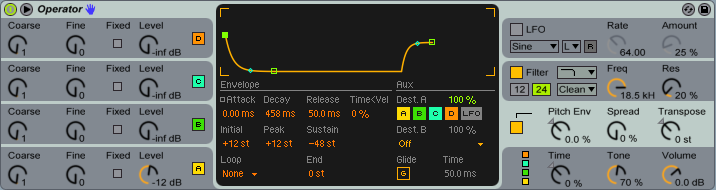
Since you gain full control of the kick drum’s phase, pitch and length you can much easier make the kick fit with your track.So let’s get started with making our own original kick drum.You’ll need a generated sine wave with an applied pitch envelope. Ableton’s Operator works just fine for this, but there are great plugins such as ’Intelligent sounds and music – BazzISM’ for this.
Start with enabling the pitch section (bottom right) and set the sustain of the pitch envelope to -48 so that we can use a pitch envelope as ”large” as possible.
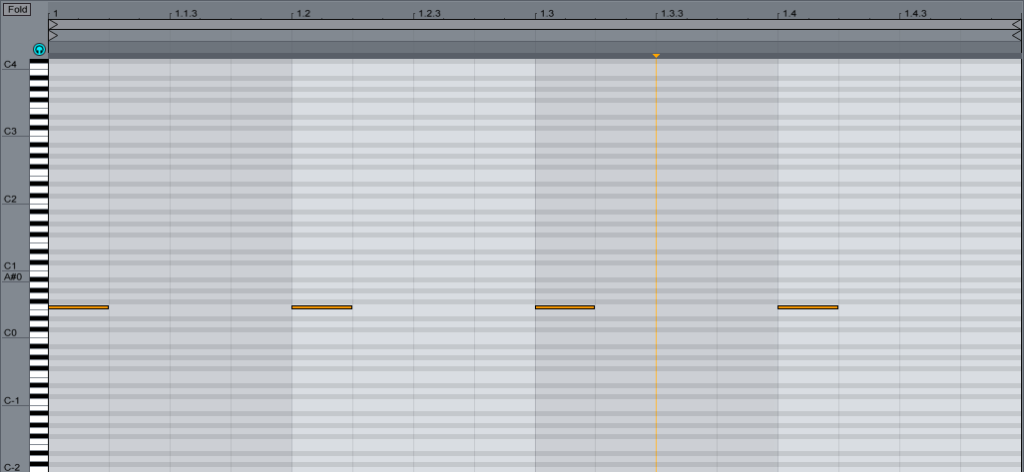
Now lay out a kick drum pattern that suits you. Here’s a basic 4/4 pattern in F0. Use the key- or root key of your track as the fundamental frequency for your kick drum.
The midi notes are 16:th notes so that we can adjust the length of the kick drum within Operator using the amp release and decay time.
We’ll need a top kick for the bottom end that we are going to generate, so highlight Operator, right click on the the top bar of the device and click ”group” (cmd G).
Open up ”chain list” and drag a Simpler to the chain, like so:

Now go to a sample library that you favour, choose a kick drum with a transient that isn’t too compressed and drag it into the Simpler.
You can hot swap this sample later if you wish to do so, but for now, let’s be basic.
Since we are only going to use the transient of the kick drum, set the decay time of the sample to something short. It’s also a good thing to enable a high pass filter so that unnecessary bass frequencies are removed from the sample.


Now back to Operator. Start with mapping the release time of both the oscillator amp and the pitch envelope to a common macro control. You can do this by right clicking the parameter that you want to map. You may also want to map the phase of the oscillator to another macro since you’ll be revisiting this parameter quite often.
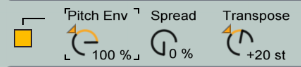
Set the pitch envelope in Operator to 100% and adjust the transpose knob until the kick has the fundamental frequency that you want. Then, adjust your macro for release time until the kick has a tail length fit for your track.
Tip: in order to avoid getting ear fatigue from listening to the same sound over and over again – apply some room reverb to your kick while you’re processing it.
Now you want to start focusing on adjusting the pitch envelope. The three parameters that you want to play around with are:decay, peak and decay slope.
Peak determines from which frequency the pitch will drop from, and decay determines the length of the envelope.

Play around with these settings and listen carefully for where the bottom end glues together with the top kick sample that you chose.
Remember to adjust the phase- and transpose parameters when you change the pitch envelope since adjusting the pitch envelope will change the phase and the fundamental frequency of your kick drum.
You want to focus on making the bottom end sound as tight and natural as possible together with your top kick. The goal here is of course to make them sound like one punchy kick drum, not two layered samples.
If your kick drum’s bottom end lacks punch, then try a larger peak amount and a shorter decay.
If it sounds like a lazer gun you probably want to decrease the peak amount and increase the decay (unless you’re doing psy trance).
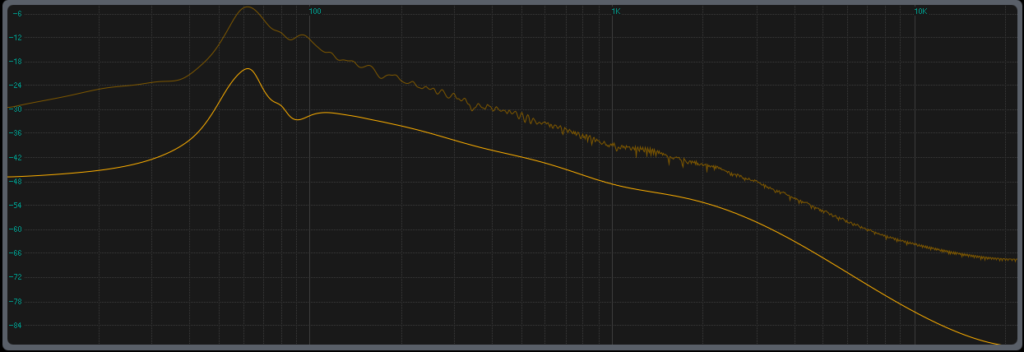
Listen for ”cavities” in your kick drum and try to fill these by only adjusting the pitch envelope and or the transpose knob. Visual feedback from a spectrum analyzer can be very helpful, and having a your track run in the background at the same time can give you a sense of what the kick drum sounds like in context.
Remember to adjust the phase macro now and then. Changing the phase of the bottom end makes a huge difference to the sound.
Also: while you’re still in the stage of adjusting your kick it is a good idea to check how it sounds at low and high volumes since our ears interpret sounds differently at different amplitudes.
Now, when you’ve come to the point where you think you can’t really add anything by adjusting the settings in Operator or the simpler it is probably time to move on to external processing.
Use some very gentle compression if you’re going to bounce the kick drum down to audio and save it to your library. This will glue the top kick and the synthesized bottom end together and it will be easier to mix if you’re going to use the kick later.
If you’re going to use the kick drum at once, apply the compression settings that you think are necessary.
A bit of the drive/base knob on Ableton’s Saturator will add some warmth and harmonics to the kick drum. You can also use Ableton’s Overdrive to gently distort certain frequencies. This can give clarity or punch to the kick drum but be careful not to overdo it.
Tip: If you are new to making your own kick drums: a good technique is to import a track with a kick drum that you really like. Lay down the same kick pattern and sidechain the reference track to your own kick drum. Now you can adjust your kick until it fits with the reference track and/or sounds similar to the kick drum in it.

Recording
What is Reverb? In a purely definitional sense, reverb (short for reverberation) is the extension of a sound beyond its natural endpoint. This process can be natural, using the size and dynamics of a recording space, or synthetic, using digital audio effects. For example, when a guitar string is plucked the string will stop vibrating […]

Interviews
Timofey Reznikov, the Grammy-nominated producer behind chart-toppers and platinum productions by artists like David Guetta, Jack Back, DVLM, and many more, invites you into his studio. In this video tutorial, Timofey shares his step-by-step process in producing a Tech House track from start to finish using solely Ableton Live and samples from illements library. Timofey […]
Mixing
Mixing and sound designing drums There are countless ways to create and mix the drums in a track since it all depends on the genre and what purpose the drums have in the mix. In a downtempo ambient track it is probably best not to compress and distort the living hell out of a drum […]